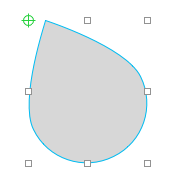
Béziers
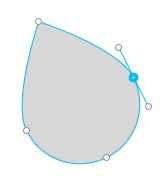
Creating a straight line
- Select the bézier tool from the toolbar.
- Click at the point where you want to start a new straight line.
- Release the mouse button before moving the cursor.
- Click somewhere else
- Release the mouse button before moving the cursor.
- Optionally, you can continue repeating the previous two steps to draw a polyline
- Optionally, close the polyline by clicking on the first control point, thus creating a polygon
Caution: moving the cursor before releasing the mouse button will make the line curved, not perfectly straight.
Creating a curved line
- Select the bézier tool from the toolbar
- Click at the point where you want to start a new curved line.
- While holding the mouse button down, move the cursor to the desired position of first curve handle
- Release the mouse button.
- Click at the point where you want to end the curved line.
- While holding the mouse button down, move the cursor to a new location and release the mouse button.
- Optionally, keep repeating the previous two steps to make a more complicated curved line
- Optionally, close the area enclosed by the curved line by clicking on the first control point.
You can always create a straight segment (or a curved segment with only a single curve handle) by releasing the mouse button without moving the cursor.
Editing a bézier
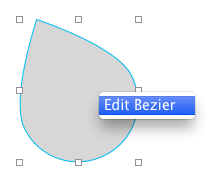
Double-click on a bézier shape to edit it. Alternatively, select the shape first and press COMMAND + E. Alternatively, select the shape first and press RETURN.
Extending a bézier path
Béziers that are not closed can be extended from both ends. To extend a bézier:
- Select the bézier
- Activate the editing mode (double-click)
- Click on either end of the bézier path
- Press OPTION or COMMAND or SHIFT or CONTROL to activate extending
- Now, when you move the cursor around, you should see yellow indication of the possible bézier extension
- Move cursor to a desired position and click. You can create both straight and curved extensions, depending on when you release the mouse button. See Creating a curved line.
- Optionally, close the bézier by clicking on the opposite end of the bézier path
Adding a new control point in the middle of a bézier
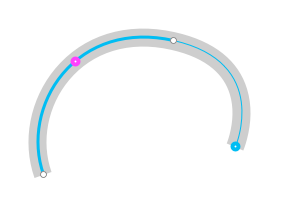
To add a new control point in the middle of a bézier, simply click at the point where you want to add the new control point. This will split the curve at that particular point to two curves, maintaining the original curvature.
Controlling the snapping behavior when adding new control points
By default, when you add new control points, they try to snap (vertically and horizontally) to other control points of béziers. To suppress this behavior, hold down the COMMAND key.
PaintCode will also try to place the new control points at coordinates that would ensure that the shape stays sharp, properly aligned in to the pixel grid. If you do not want this behavior, hold down the CONTROL key to place the point anywhere you want. Somewhere between these behaviors is the OPTION key - it forces the coordinates of the new control point to be either integer points or half-points.
Often it is very useful to draw precise horizontal, vertical or diagonal lines. To restrict the position of the new control point to better draw these lines, hold down the SHIFT key.
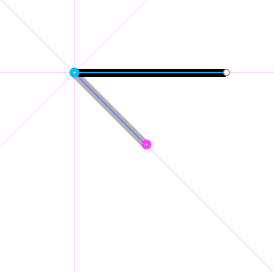
Adjusting control point position
You can move individual control points around by dragging them. PaintCode will help you draw sharp drawings by aligning control points to certain positions. This behavior depends on your stroke and stroke width settings, so it is always a good idea to set these settings to final values before moving the control points.
Don't worry, even if you forget to do so, you can always fix it later. But if, for example, you draw your bézier with stroke width = 1, and later change it to stroke width = 2, your drawing will not be as crisp as it could be. To fix this, you will have to readjust the control points manually, since PaintCode does not automatically rearrange all control points when you change the stroke settings.
Without any modifier key pressed the control point will be “crisp” at the new position (by snapping to the nearest “crisp” coordinate).
With OPTION pressed, the dragged control point will lie in the half-point grid when released.
With CONTROL pressed, the snapping behavior of the dragged control point is suppressed entirely - the control point will be at an arbitrary position when released.
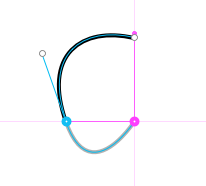
The dragged control point will also snap to coordinates of other control points to help you out. However, you can turn this behavior off by holding down the COMMAND key.
Adjusting control point position with keyboard
It is also possible to move the control points around using the keyboard. First, select a control point by clicking on it. Then, press an ARROW key to move it. By default, this moves the control point by a single point.
To move the control point more quickly, hold down the SHIFT key while pressing the ARROW key. This moves the control point by multiples of 10. You can also move the control point by half-points - just hold down the OPTION key while pressing the ARROW key.
By pressing COMMAND + LEFT ARROW or COMMAND + RIGHT ARROW, you can switch the current control point selection to a neighbouring control point.
Adjusting curve handles
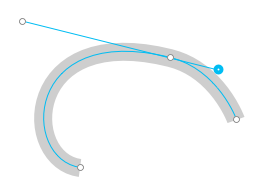
Curve handles can be adjusted by dragging them. If the control point and both of its handles are aligned, the opposing curve handle will move together with the handle you are dragging to preserve the alignment. To suppress this behavior, press OPTION while dragging.
On the other hand, if the control point and its curve handles are not aligned, the handles will move independently. In such cases, pressing OPTION will force the opposing handle to align.
In order to snap curve handle to horizontal, vertical and diagonal lines, press SHIFT while dragging it.
Controlling the curvature
A control point does not always have both curve handles. For example, in the case of a line or polyline, the control points do not have any curve handles. You can add and remove curve handles at any time.
To remove a curve handle, select it by clicking on it and press DELETE or BACKSPACE.
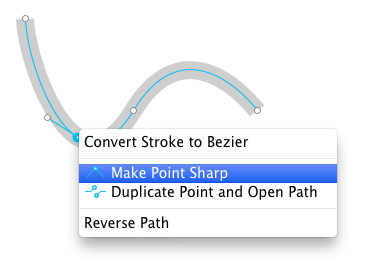
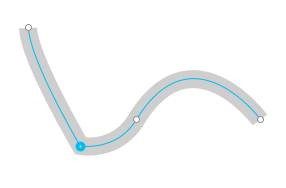
To add both curve handles to a control point, select the “Make Point Round” option from the control point contextual menu. To remove both curve handles, select the “Make Point Sharp” option.
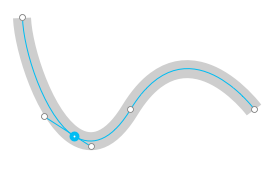
Closing a bézier
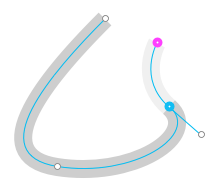
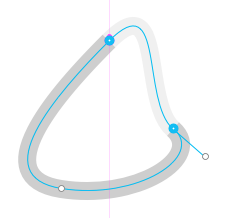
- Select one of the ending control points
- Press OPTION or COMMAND or SHIFT or CONTROL to activate extending
- Click on the opposite ending point. You should see a preview of the closed bézier while hovering the opposite ending point.
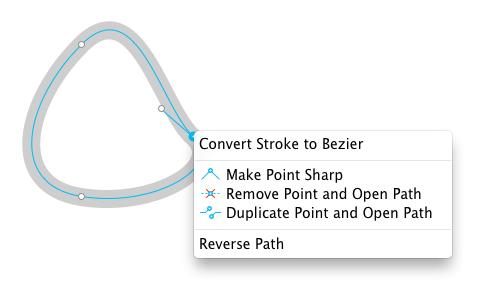
Control point contextual menu
Aside from controlling the curvature around the control point, the control point's contextual menu provides you with several other handy features for removing control points, opening the path, duplicating a control point and even reversing the direction of a contour, which is useful when you use PaintCode to generate bézier animation curves.
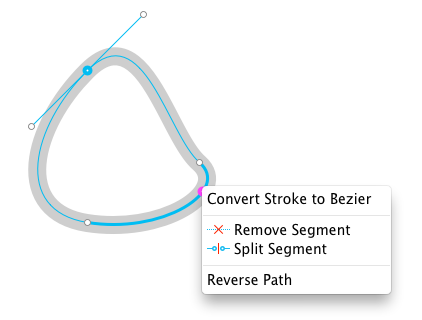
Segment contextual menu
Individual segments of the bézier also have their own contextual menu. The actions in this menu let you remove the segment or split it at an arbitrary point.
Boolean operations
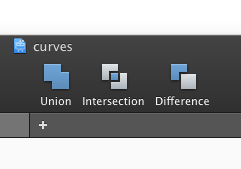
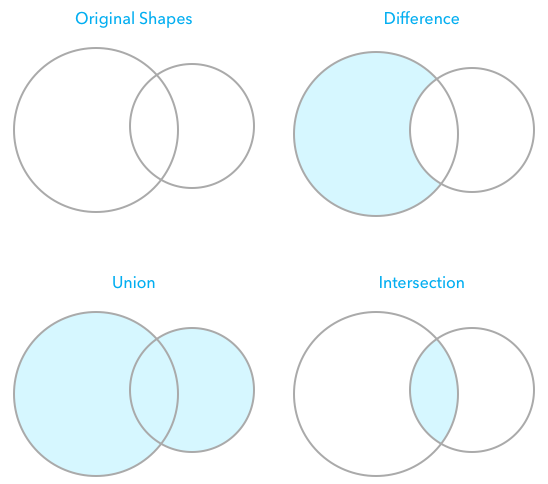
PaintCode supports 3 boolean operations: union, intersection and difference. Using them is simple. First, select two or more shapes from the Canvas. Then, click on the desired operation icon in the toolbar or use one of the “Selection / Union”, “Selection / Intersection” and “Selection / Difference” options from the application menu.
PaintCode will create the resulting shape. This shape will take its appearance settings (such as stroke, fill, ...) from the bottommost original shape. All original shapes will remain intact.
Applying transform to a bézier
Béziers, as all other shapes and groups, can be transformed by rotation, scale and offset. In case of béziers, it is possible to apply the transform to the control points of the bézier. This will recalculate positions of all control points and also remove the transform from the bézier.
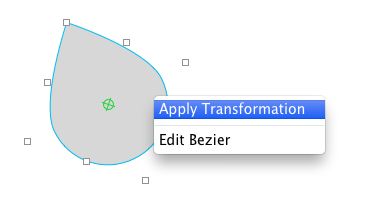
Bézier with applied transforms:
